Getting consistently round, thin, and easy-to-release tortillas at home depends on more than just the dough and the press itself. The proper way to line a tortilla press is a crucial step that prevents sticking, preserves the press, and ensures your tortillas come out perfectly every time. Whether you’re making corn, flour, or specialty flatbreads, understanding how to line your press will save you frustration and help you achieve professional results in your own kitchen.
Before diving into the step-by-step process, it’s helpful to know that lining a tortilla press is not just about convenience—it also protects your equipment and can even influence the texture of your tortillas. If you’re interested in exploring more uses for your press, such as making sweet doughs or dumpling skins, you might find guides like how to press tortillas for gorditas de azucar or how to use a tortilla press for dumplings skins helpful as well.
Why Lining Your Tortilla Press Matters
Pressing dough directly onto the metal or wooden surfaces of a tortilla press can cause sticking, tearing, and uneven thickness. Over time, dough residue may also lead to rust or wear, especially with cast iron models. Using a liner creates a nonstick barrier, making it easy to lift the tortilla and transfer it to the griddle without distortion. Additionally, lining your press keeps it cleaner and extends its lifespan, reducing the need for frequent deep cleaning or re-seasoning.
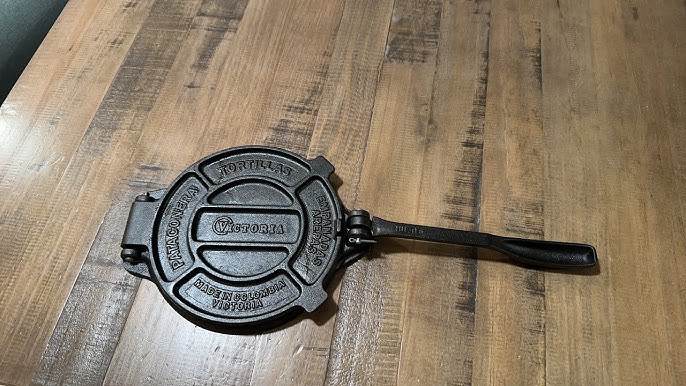
For those using a cast iron press, regular maintenance is essential. You can learn more about caring for your press from these care instructions for cast iron presses.
Choosing the Best Liner for Your Tortilla Press
There are several materials commonly used to line a tortilla press. Each has its advantages, and the right choice depends on your preferences and what you have available:
- Plastic (Zip-Top Bags or Food-Grade Sheets): Cut-open zip-top bags or food-safe plastic sheets are the most popular option. They are flexible, reusable, and provide a smooth, nonstick surface.
- Parchment Paper: This is a great alternative for those who prefer a disposable, compostable option. Parchment is naturally nonstick and easy to cut to size.
- Wax Paper: Also works well, but may not be as durable as plastic or parchment, especially for repeated use.
- Reusable Silicone Mats: These are eco-friendly and long-lasting, though they may be thicker and can affect the thickness of your tortillas if not chosen carefully.
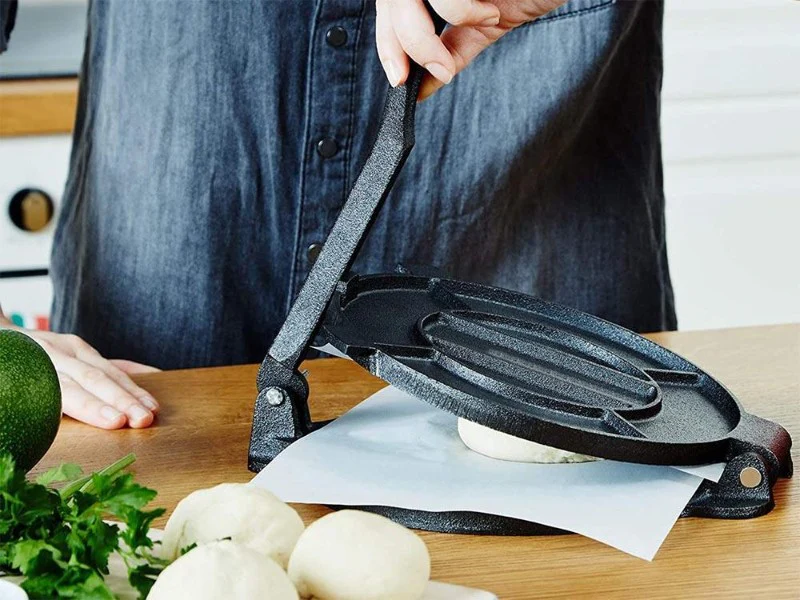
Regardless of the material, the key is to use two sheets—one for the top and one for the bottom plate of the press. This sandwiching method prevents the dough from contacting the press at any point.

Step-by-Step: The Proper Way to Line a Tortilla Press
Follow these steps for optimal results every time you press tortillas:
- Prepare Your Liner: If using a zip-top bag, cut off the zipper and sides to create two flat sheets. For parchment or wax paper, cut two squares slightly larger than the diameter of your press (usually 8–10 inches).
- Place the Bottom Sheet: Open your tortilla press and lay one sheet centered on the bottom plate.
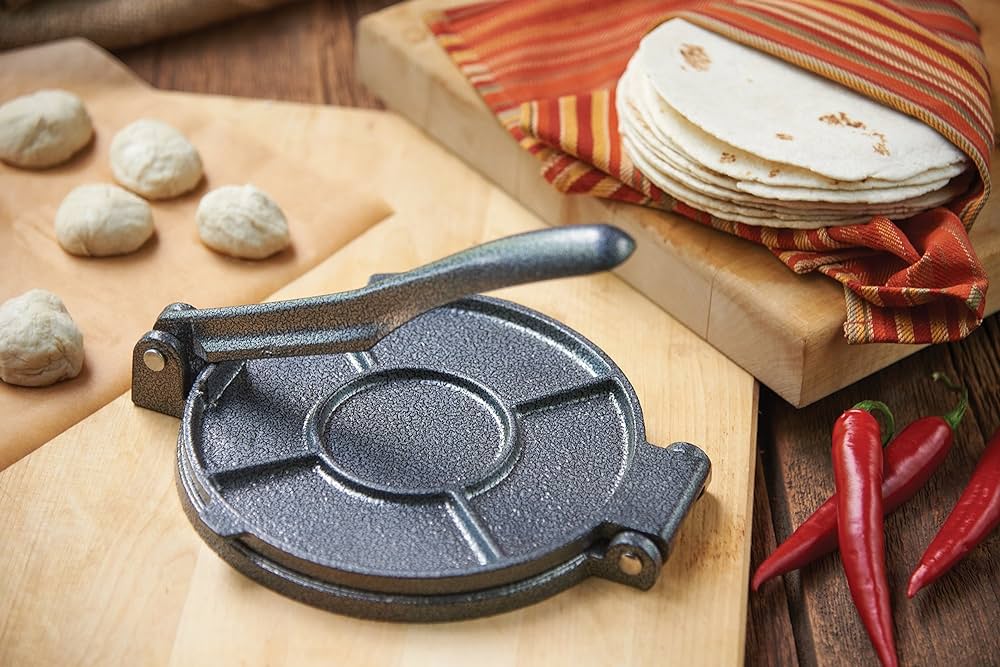
- Add the Dough Ball: Place your portioned dough ball in the center of the liner. For most presses, a golf ball-sized piece is ideal.
- Cover with the Top Sheet: Lay the second liner sheet over the dough ball, aligning it with the bottom sheet.
- Press Evenly: Close the top plate and press down firmly but gently. The dough will flatten into a perfect circle between the liners.
- Open and Peel: Lift the top plate, then carefully peel back the top liner. Gently lift the tortilla (using the bottom liner for support) and transfer it to your hot pan or griddle.
- Repeat: Reuse your liners for multiple tortillas, wiping them clean as needed. Replace if they become torn or excessively sticky.
This method ensures the dough never contacts the press, resulting in easy release and minimal cleanup.
Tips for Consistent, Nonstick Results
Even with the right liner, a few extra tips can make your tortilla-pressing experience smoother:
- Keep Liners Clean: If dough starts to stick, wipe the liners with a damp cloth or replace them.
- Use the Right Dough Hydration: Overly wet dough can seep through liners and cause sticking. Adjust water content as needed for your recipe.
- Press Gently: Excessive force can cause liners to tear or dough to squeeze out the sides. Apply steady, even pressure.
- Align Liners Each Time: Make sure both sheets are centered to avoid uneven tortillas.
For those experimenting with specialty doughs, such as pastry or pizza, see guides like how to use a tortilla press for pastry dough and how to use a tortilla press for thin crust for more tailored advice.

Maintaining Your Press After Use
Proper care after pressing tortillas is just as important as lining the press beforehand. Remove any remaining liner material and wipe down the plates with a dry or slightly damp cloth. Avoid using soap on cast iron presses, as it can strip the seasoning. For long-term storage and rust prevention, especially with cast iron, refer to resources like how to store a cast iron press long term.
Storing your press in a dry place and occasionally re-seasoning the surface will keep it in top shape for years of tortilla making.
Common Mistakes to Avoid When Lining a Tortilla Press
Even experienced home cooks can run into issues if not careful. Here are some pitfalls to watch out for:
- Using Only One Sheet: Always use two sheets—one above and one below the dough—to prevent sticking on both sides.
- Liners Too Small: If the liner doesn’t cover the entire pressing surface, dough can squeeze out and stick to the press.
- Reusing Torn Liners: Replace liners that have holes or tears to avoid dough sticking through the gaps.
- Neglecting to Clean Liners: Built-up residue can cause sticking and affect the taste of your tortillas.
By following these guidelines, you’ll get the most out of your tortilla press and enjoy hassle-free tortilla making every time.
Frequently Asked Questions
Can I Use Aluminum Foil to Line My Tortilla Press?
Aluminum foil is not recommended as a liner for tortilla presses. It tends to tear easily under pressure and can stick to the dough, making it difficult to remove the tortilla cleanly. Stick with plastic, parchment, wax paper, or silicone sheets for best results.
How Many Times Can I Reuse Plastic or Parchment Liners?
Plastic liners, such as cut zip-top bags, can be reused for several rounds of tortillas as long as they remain clean and intact. Parchment paper can also be reused a few times, but it may start to tear or absorb moisture after several uses. Replace liners whenever they become sticky, torn, or excessively dirty.
Do I Need to Oil the Liners or Press Plates?
No, oiling the liners is not necessary if you’re using nonstick materials like plastic or parchment. In fact, adding oil can make the dough too slippery and affect the pressing process. If you’re using a cast iron press, keep it seasoned, but rely on the liners for nonstick performance.
What Size Should I Cut My Liners?
Cut your liners to be about 1–2 inches larger than the diameter of your press. For an 8-inch press, 9–10 inch squares work well. This ensures full coverage and prevents dough from escaping the edges.
Mastering the proper way to line a tortilla press is a simple yet essential skill for anyone who loves making tortillas or flatbreads at home. With the right materials and a few easy steps, you’ll enjoy perfectly shaped, easy-to-handle tortillas every time you press. For more tips and specialty uses, explore related guides throughout our site and keep your press in top condition for years of delicious results.